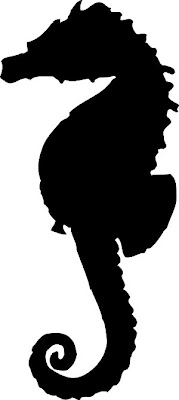
Once we imported out chosen image onto AE we set about making a mask for the shape. However, before we did that we had to make a layer which we block coloured so we could make the mask out of their layer. There are many different mask tools on AE, you can use the shaping tools which make basic masks in the shape of a rectangle, circle, oval etc or you can use the pen tool, you can have a (-) or a (+) vertex which means that you can make a mask that can mask what ever is inside of the mask or outside of the mask.
Due to the bumps and all of the curved edges of the seahorse silhouette it wouldn't get a good idea to use a shape mask as it wouldn't catch any of the detail. I had to use the pen mask, however, when i initially made the mask i made so many points in the mask that it would have been rather labour intensive to move all of the individual points. Jon showed me a clever and rather easy trick to make less points. When you click to make a point hold it down and then you can make the like curved, it means that you can dramatically reduce the amount of points - make it easier to animate, as well as making it less complicated. However, i found that when i went to move the points later on, due to the curve of the line i had put in place, it was difficult to get rid of the initial curve, and ended up looking a little odd.
Once i had made the mask i deleted the image of the seahorses silhouette. I made a new composition to be 10 seconds long and i made the back wing flap and the tail tip unwind a little to make it look like it was moving. To make it look realistic the wind movement would have had to be so quick that it looks like a blur, however, due to memory on the play back and problems with cacheing the animations i decided to keep it less realistic.
I am not 100% sure why i saved this screen shot. I think i liked the pattern that i made - this was my initial mask before i learnt that i could make a curved mask by holing the mouse button down for longer.
***CURRENTLY UPLOADING A VIDEO ONTO VIMEO ONCE I HAVE DONE THAT I WILL UPLOAD THE SEAHORSE BY ITSELF***
Once i had finished animating the seahorse by itself, i then moved onto deciding what image i would like for the background. I was initially thinking something simple like a plain sea and sand, but i though as my seahorse will be one bright but flat colour, i should probably add more depth by having a background with a lot going on so i took this image from google images:
I imported the image above onto AE and made a new composition 10 seconds long. I added the background images and then i imported the previous seahorse animation i made. Like the previous task i have completed you can simply make a layer move by key-framing the first position of the layer off screen, moving the time line on a few seconds and key frame again, AE will then fill in a smooth transition between each key frame. However if i did this, it would mean that my seahorse would be moving in a straight line - which sea horses DONT do. Therefore i decided that i would need to make my seahorse bob up and down. It just happened that when i made the first two points - the same curved like that i used on AE to make my smoother mask appeared and i could make the path of the sea horse smoother arch shapes rather then harsh triangular shapes. I took a PRINTSCREEN of the process for future reference and for other students in the class to see. You simple right click on each point, click 'KEY FRAME INTERPOLATION' and then change it from 'LINEAR' TO 'BEZIER'. This makes the path smoother as you can see from the image.
(In the print screen below i did had the background in the composition but i hid it from view so i could concentrate on the bobbing movement.)
Once i has happy with the path of the seahorse I played it back with the background to see how it worked. I am pretty happy. Like the Quad bike exercise i simple copy and pasted the bobbing sea horse composition 3 times and individually re-scaled them to make them look different, i also passed them at different times - the further away from the camera the slower it will appear, and the closer to the camera the faster it will appear. I then flipped the paths o the sea horses so that they went back on eachother to create the illusion of more seahorses.
UPLOAD VIDEO URL WHEN UPLOADED TO VIMEO


No comments:
Post a Comment