
Friday, 19 October 2012
19/10/12 Lesson three

 Today we were shown an example Photoshop image of a 'Keep Out' sign that Jon created for his bedroom door. The aim of the class today is to make our own door design using various images that Jon uploaded to the myUCA website, and other images that represent us.

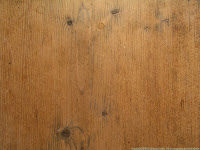 The images we were given to use are the three images to the left and the one above to the right. We opened Photoshop with the standard settings, film/video, square pixels/widescreen, this means that we can see the guidelines. We then opened all of the image files Jon uploaded onto Photoshop and added the Wood as the background layer to act as the door. From practicing with Photoshop at home i feel like i have learnt a lot in the last three weeks and felt comfortable enough to go ahead of the class and find other images that i could include, e.g. other signs and some nuts and bolts maybe a coffee cup stain and other textures that could be really interesting.
Techniques that i have learnt in this lesson : Drop shadowing. fx at the bottom of the tool bar and scroll down the list until you get to Drop shadow, you can then play around with the height and depth of the shadow and the intensity of the colour.
This is a image of the one i created in class but I DON'T LIKE IT. Its too manly, so i am going to recreate another one which is more girly and me.

12/10/12 Lesson two
(i forgot to press publish)
Like last week we were doing Photoshop exercises today which was extremely welcome due to my lack of computer skills. Our first task was to open and download a file from the UCA website and put it on our desktop. We had to open the file and import it onto Photoshop. The file was a image of some fruit and vegetables and a cutting board.


Like last week we were doing Photoshop exercises today which was extremely welcome due to my lack of computer skills. Our first task was to open and download a file from the UCA website and put it on our desktop. We had to open the file and import it onto Photoshop. The file was a image of some fruit and vegetables and a cutting board.

The main aim of the day was to rearrange the image above, but the images out and rearrange them onto the cutting board. Jon went through various techniques that we could use of Photoshop to do this. I decided that i would use the magic wand tool to delete most of the background and then the magnetic pen tool and the other pen tool. I was actually really happy with myself as i managed to actually do what was asked with out asking too many questions. This is what i came up with.

I am sure they will be many people out there that are complete whizzes of Photoshop and think what i did is a bit naff but i'm really happy with the outcome. I am feeling more and more confident every week and i am looking forward to next Friday for my next lesson!
Sunday, 7 October 2012

First Photoshop tutorial

Subscribe to:
Posts (Atom)